Once you have installed the CatDV web application, you can access it using a regular web browser by going to the address:
http://hostname:8080/catdv2/WebClient.html
(The exact address may be slightly different on your system, depending on how the web application was deployed.)
You should then see the CatDV web interface, with the screen divided into the following areas, broadly matching that of the CatDV client application:
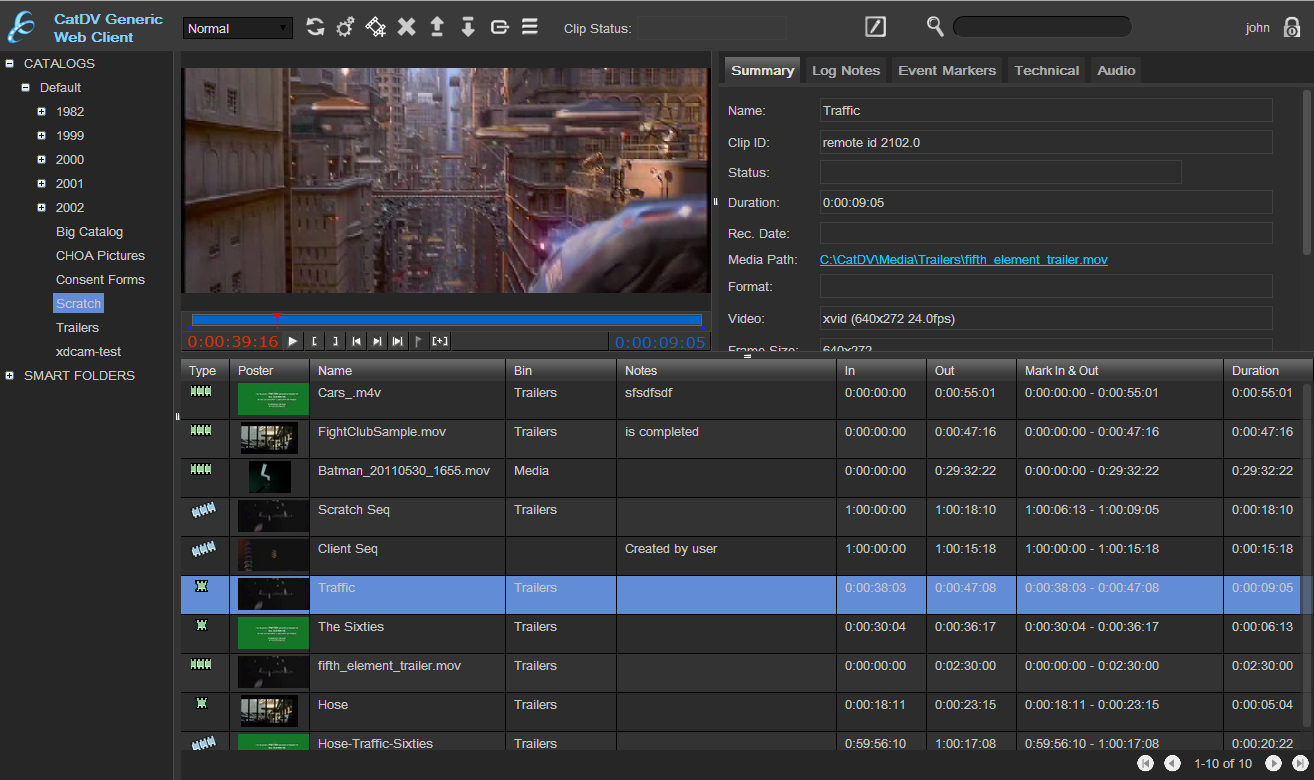
- A header panel across the top, with toolbar buttons, a search box, and button to log in/out of the server.
- A tree down the left which shows catalogs and smart folders from the server that you have access to
- A list of clips to the bottom right of the window shows the contents of the current catalog or query results.
- The clip details are at the top of the window shows details of the current selected clip
Logging on
When you first enter the web application you will be asked to log on to the server. If the login dialog isn’t shown automatically you can log in by clicking on the padlock icon in the toolbar.

You should log on using the same user name and password that you use in the CatDV client application.
Accounts are created by an administrator user using the Server menu on the CatDV client application. Depending on how the system is set up, even if you don’t log in you may still be allowed to browse clips and catalogs in the “Anonymous (public)” group.
When you are logged on, your user name is shown in the header panel. Click the padlock again to log off when you are finished.
Browsing the server
Using the tree you can browse catalogs on the server that you have access to. Catalogs are arranged by production group. Click on a catalog to browse the clips in that catalog.
The clips are shown in the main part of the window. Using the view dropdown in the header panel you can choose how the clips are shown, as a table or as a grid of thumbnails.
Viewing clips
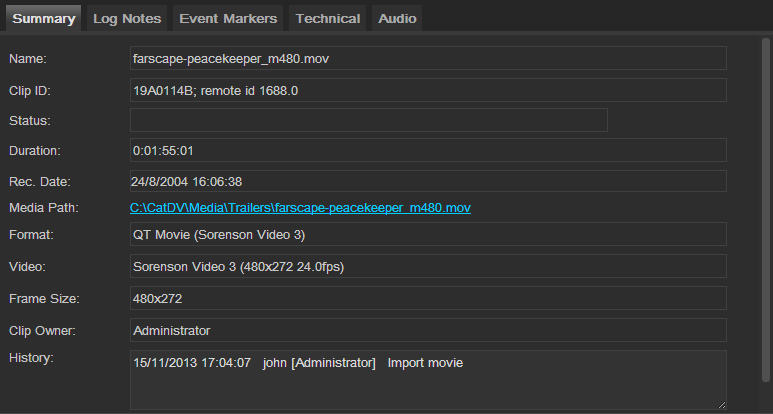
Click on a clip in the main part of the window to view available details of that clip, arranged under different tabs. Technical metadata for the selected clip are visible under the ‘Media’ and ‘Metadata’ tabs, while general fields are shown under the ‘Summary’ and ‘Advanced’ tabs and log notes are shown under ‘User Fields’.
A thumbnail for the clip is shown. If the clip is playable (it’s a video clip, and a suitable web proxy video for that clip exists) you can click on the thumbnail to play the clip. Depending on the format and size of the clip it may take a few moments before the clip starts playing.
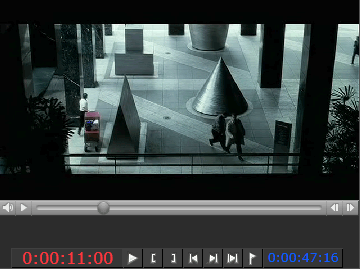
When a clip has playable video, use the toolbar buttons to: play or pause the movie, mark a selection (in2/out2 points) to highlight a section of interest within the clip., to jump to the start or end of the selection, or play the selection from beginning to end. Just as in the CatDV client application, the timecode value of the current frame is shown in red, while the duration of the selection (or of the entire clip if no selection has been made) is shown in blue.
Editing clips
Depending on the user you log on as, which production groups you are a member of, and what permissions you have in the current catalog group, you may or not have permission to edit the selected clip.
Initially clips are read only, but if you are allowed to edit the clip you will see an icon in the toolbar to unlock and start editing the current clip. Fields whose value you can change have a lighter background colour.
Once you have made any changes, click on the tick icon to confirm your changes and save the clip to the server, or the cross icon to cancel your changes and revert to the latest version of the clip from the server.
Using event markers
If you go to the ‘Event Markers’ tab you will see a list of any timecode markers that have been defined for the current clip. Markers normally have a name and can also be assigned a category and description.
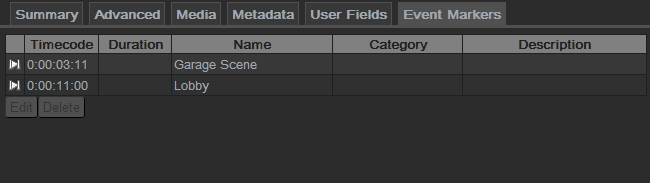
There are two types of marker, those that identify a specific frame of video (an “event”) or those that define a portion with a start timecode and a duration (a “range”). Click on an event marker in the table to jump to that point in the video. If it’s a range marker, click on the play icon to play the selection.
If you are editing the current clip you can edit or delete the selected marker, and you can also create new markers by marking the portion of video you are interested in (either an event or a range) and clicking on the flag button.
Performing queries
As well as browsing the database by catalog you can search the database and display matching clips by performing a query.
To perform a simple free-format text based query across all the main clip logging and media fields (name, notes, bin, tape, media path, user-defined fields and media metadata fields) type some keywords into the text box in the tool bar and press Enter.
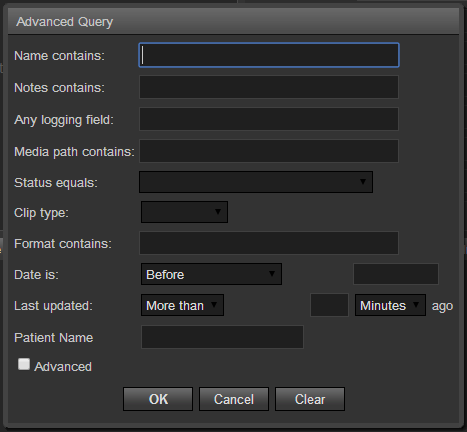
To perform a more advanced query against specific fields press the search button in the tool bar. You can search various logging fields including the clip status or search by date and clip type. Leave any fields you don’t want to include in the search blank.
Session limit
Your license may limit the number of concurrent sessions that the web interface will support. If you see a message that a session limit has been reached, please log off and try to access the system later.
If you don’t send any commands to the server for 30 minutes your web session will expire and you will need to log on again.