The Web 2 interface provides a simple drag and drop sequence editing facility to create rough cut edits. It is not intended to be a full-featured video editor. It does not provide any of the advanced facilities that you would expect from a video editing package, such as transitions etc. It is purely intended to allow the user to compile simple shot-lists that can be sent to an editor for final editing.
Opening a Sequence
To create a new sequence select the clips you want to be in the sequence in the clip list on the home page and click the Create Sequence button in the action panel. To edit an existing sequence open it by clicking its name in the clip list and then click the Edit Sequence button in the view clip page’s action panel.
Sequence Editor
The sequence editor is shown below:
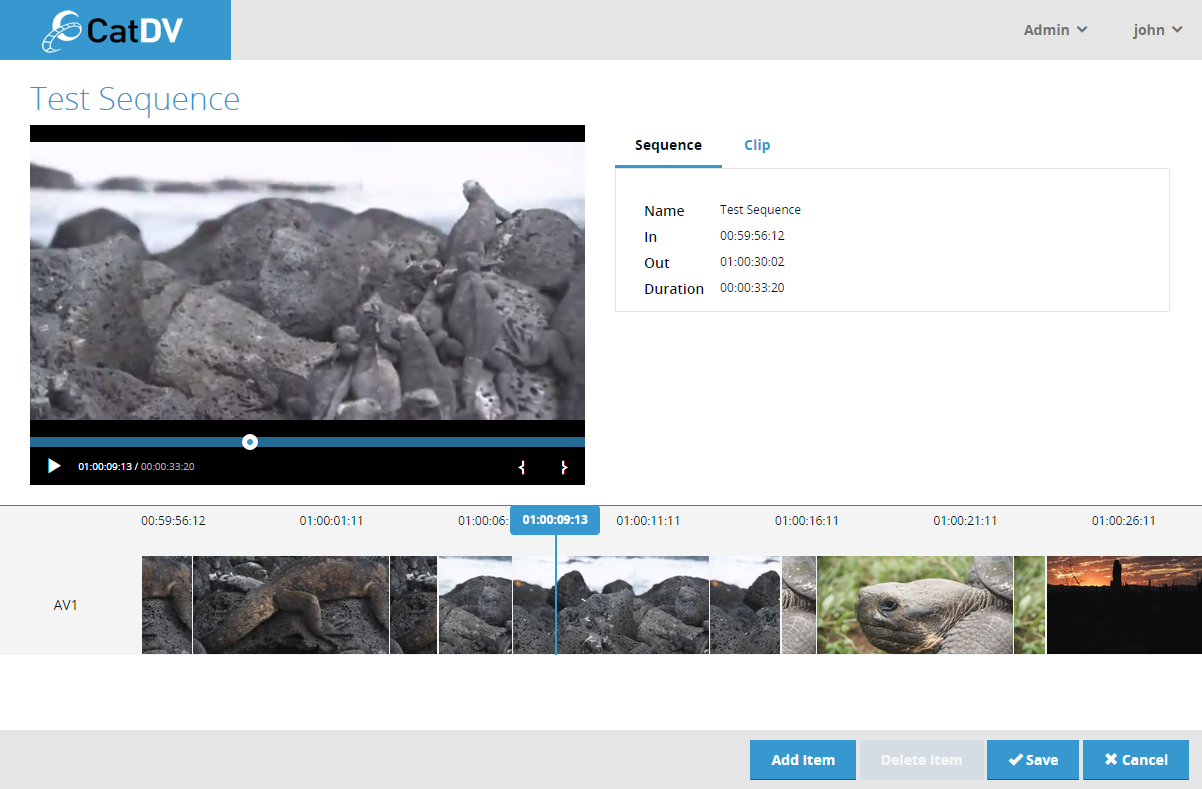
The sequence editor is divided into three panels:
- Player – the player panel plays either the complete sequence or the currently selected clip within the sequence.
- Details – the details panel displays basic details for the whole sequence or the currently selected clip within the sequence.
- Timeline – the timeline shows all the clips that make up the clip arranged in time order along the timeline.
Editing Mode
The sequence editor operates in two distinct modes:
- Preview Mode – allows the complete sequence to be played or scrub through by clicking the play button in the player, or by dragging the play head in either the player or the timeline.
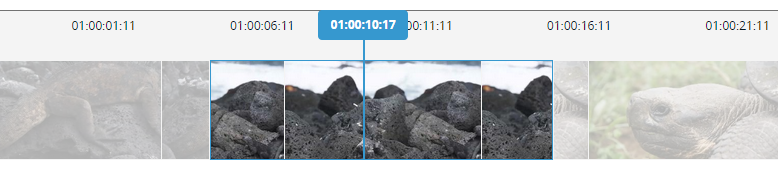
- Editing Mode – to edit the items within a sequence one of the clips in the timeline must be selected. When a clip is selected it is highlighted in the timeline and the player window switches to displaying the selected clip and the details panel switches to displaying the details for the selected .
The image below shows a the display of the selected clip in the timeline. Notice that the other clips are greyed out and the selected one has a highlight border.
Once in editing mode you can adjust the portion of the clip that should appear in the sequence by setting the in and out points of the selected clip using the set mark-in and set mark-out icons in the player’s control panel. The timeline is updated in real time as the in/out points are adjusted.
To return to preview mode either click to the left of the timeline (on the AV1 track title) or select the Sequence tab in the details panel
Adding Clips
Clips can be added to the sequence by clicking the Add Item button in the action panel. This will display a clip browser panel that is essentially the same as the clip browsing facility of the home page. Simple browse by catalog or path, or enter a search, to identify the clip or clips that you wnat to add and then click Add.
Saving
Once editing is complete click Save to save changes to the server.