When you click on a clip in the main list the selected clip is displayed in the clip details panel above the list:
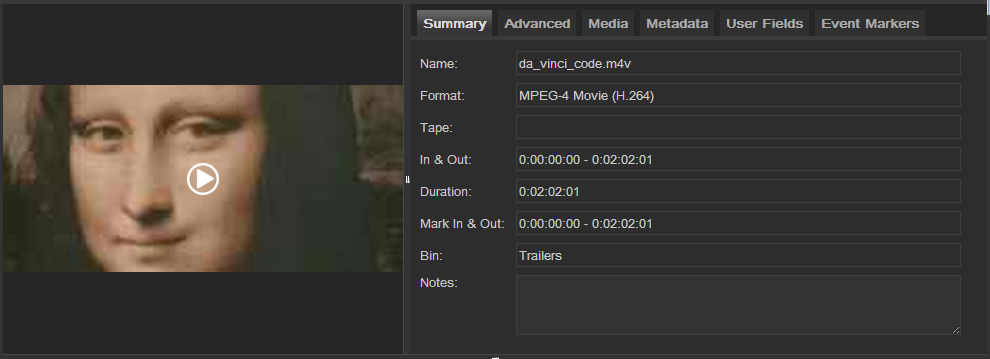
The clip details panel is sub-divided into two areas:
- The preview/player area to the left initially displays the poster thumbnail for the clip. If the clip is playable (it’s a video clip, and a suitable web proxy video for that clip exists) a play icon is displayed over the image and you can click on this to play the clip. Depending on the format and size of the clip it may take a few moments before the clip starts playing.
- Metadata associated with the clip is displayed in the right hand details panel, arranged under different tabs. Technical metadata for the selected clip are visible under the ‘Media’ and ‘Metadata’ tabs, while general fields are shown under the ‘Summary’ and ‘Advanced’ tabs and log notes are shown under ‘User Fields’.
Video Player
The Video Player allows you to preview the web-proxy associated with the clip:
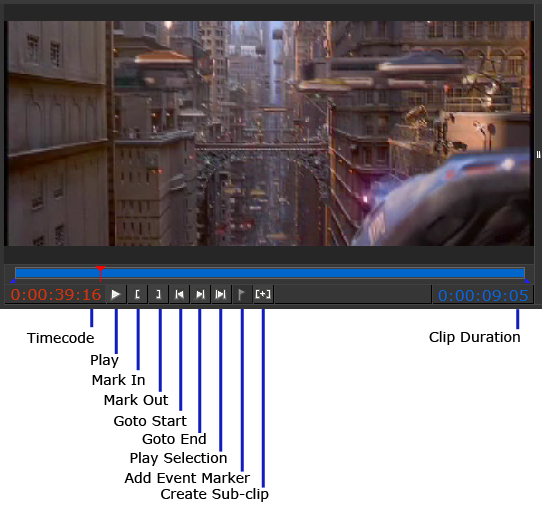
The control bar, at the bottom of the player contains a time-line with a play-head that indicates the current position within the clip (you can drag this to navigate to another part of the clip), and below that a set of controls to allow you to control playback and other functions:
- Play/Pause – starts and stops playback at the current head position
- Mark In / Mark Out – set the Mark In and Mark Out point at the current play head position. The region between the Mark In and Mark Out points is known as the selection and is indicated by the blue region on the time-line. The two blue triangles at each end of the selection can be dragged to adjust the position of the Mark In / Out points .
- Go To Start/End – moves the play head to the beginning/end of the clip
- Play Selection – plays the clip starting at the Mark In point and ending at the Mark Out point
- Add Event Marker – adds and Event Marker – see Event Markers section below
- Create Sub-Clip – Creates a new sub-clip that contains just the selected part of this clip.
When a clip has playable video, use the toolbar buttons to: play or pause the movie, mark a selection (in2/out2 points) to highlight a section of interest within the clip., to jump to the start or end of the selection, or play the selection from beginning to end. Just as in the CatDV client application, the timecode value of the current frame is shown in red, while the duration of the selection (or of the entire clip if no selection has been made) is shown in blue.
Editing clips
Initially clips are read only, but if you have the necessary permissions to edit the clip (which will depend on the user you log on as, which production groups you are a member of, and what permissions you have in the current production group) then you will see the Edit icon in the toolbar to initiate editing of the current clip.

Once you have made any changes, click on the tick icon to confirm your changes and save the clip to the server, or the cross icon to cancel your changes and revert to the latest version of the clip from the server.
Editing Markers
Markers allow you to add metadata that relates to just a part of a clip. There are two types of marker, those that identify a specific frame of video (an “event”) or those that define a portion with a start timecode and a duration (a “range”). You can create an event marker (when the clip is in edit mode) by clicking the Add Event Marker button in the control bar. This will display the Event Marker dialog:

Here you can give the Event Marker a name and specify whether it refers to a single instance (which will be where the play head currently is), or a range of times (which will be the selected region between the mark-in and mark out points). You may also specify a category and description for the marker.
Viewing Event Markers
The Event Markers for a clip are displayed in two places – on the time-line of the video player and in the Event Markers details tab.
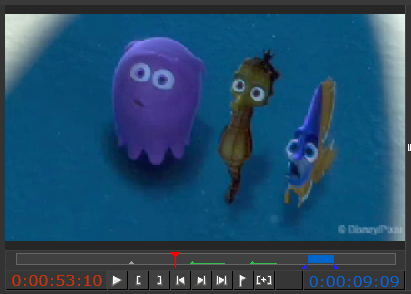
In the video player single instance event markers are shown as grey triangles and range markers are shown as a green line with a small triangle at the start.
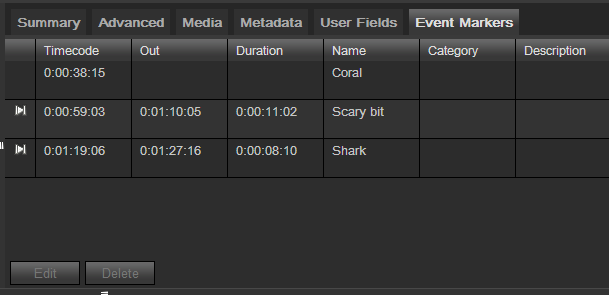
In the ‘Event Markers’ tab you will see a list of all the markers that have been defined for the current clip. If you click on an event marker in the table the play-head will jump to that point in the video. If it’s a range marker, click on the play icon to play the selection.
If you are editing the current clip you can edit or delete the selected marker, and you can also create new markers by marking the portion of video you are interested in (either an event or a range) and clicking on the flag button.