When you click on the name of a clip in the clip list on the home page the clip details page is displayed:
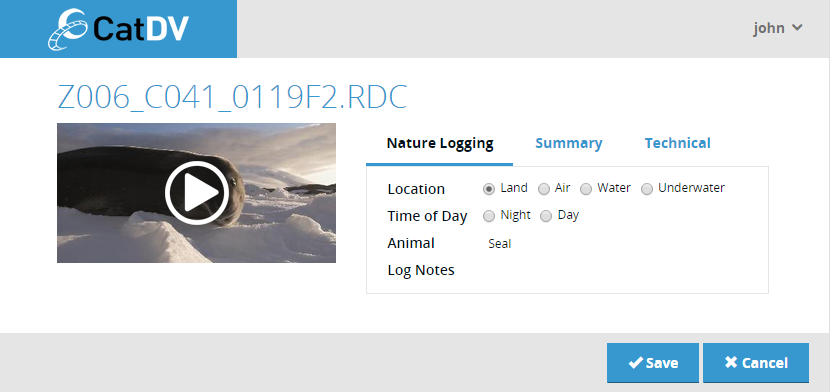
In its simplest form the view clip page displays a preview of the clip’s media on the left hand side and the clip’s metadata on the right hand side.
Media Player
If the media is playable (not a still image) and a valid proxy file exists for the clip then a play icon is displayed superimposed over the preview image. Clicking play brings up the media player:
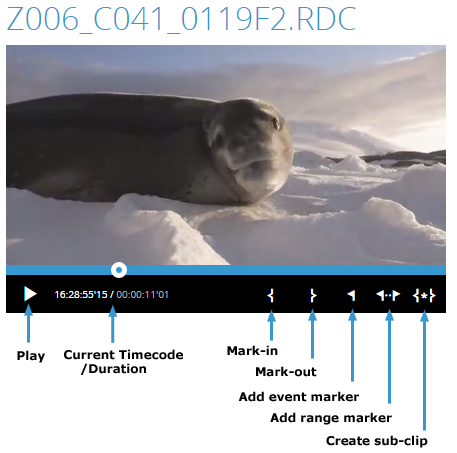
The media player consists of tree panels – the player itself, the timeline and the controls panel.
The timeline represents to duration of the clip and includes a play head that moves, indicating the point in the whole clip of the currently displayed frame. The user can drag the play-head to view a different part of the clip.
The control panel contains a set of icons that perform the following actions:
- Play – toggles between playing the video or pause
- Current Timecode / Duration – displays the timecode of the current frame and the duration of the clip. Note that, depending on how the clip is encoded, the timecode may not start at zero at the beginning of the clip.
- Mark-in– sets the mark-in point of the current clip to the current frame.
- Mark-out – sets the mark-out point of the current clip to the current frame.
- Add event marker – creates an event marker at the current frame. A dialog box will open to allow details of the marker to be entered.
- Add range marker – creates a range marker between the current mark-in and mark-out points. A dialog box will open to allow details of the marker to be entered.
- Create sub-clip – creates a new sub-clip based on the current mark-in and mark-out points.
Metadata Tabs
To the right of the player are the the metadata tabs. These tabs can (with certain constraints) be customised to display whatever selection of built-in or user-defined fields makes sense for your workflow. In the absence of any custom defined tabs a set of pre-defined tabs (Summary, Log Notes and Technical) will be displayed that display the key information about each clip.
If the currently logged in user has the relevant permissions then the user can edit the metadata displayed in these tabs. Once edited the user must click the Save button in the action panel under the metadata panel to save their changes to the server. Clicking Cancel will return the user to the home page discarding any changes they have made.
Timeline Markers
If the current includes markers they are displayed below the player:
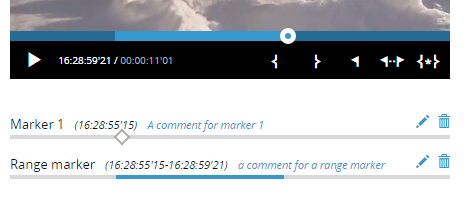 Each marker is displayed on a separate row below the clip. Each row displays the name of the marker, and the timecode(s) that define the position of marker within the timeline. If present the marker description is also displayed.
There are two types of markers:
- Event Markers – mark an individual instant in time (a single frame) in the clip
- Range Markers – cover a range from a start time to an end time.
Each timeline row also include two action icons – Edit (pencil icon) and Delete (trash can icon) to allow the user to edit the marker’s name/description or to remove the marker completely.
New markers can be added using the Add Event Marker and Add Range marker buttons described previously.