Once the installation process has completed the installer launches the post-installation Setup Wizard, which will lead you through the steps required to set up CatDV Server for first use. The Setup Wizard is actually part of the CatDV Server Control Panel application and can be accessed at any time from the Control Panel if for any reason you need to make changes to the configuration.
The Setup Wizard
The Setup Wizard consists of a number of steps – each one on a separate tab. Normally you will fill in the information required on each tab and then press Next > to move onto the next one. You can however go directly to a particular step by clicking on the desired tab.
Each tab has a small icon on it that indicates the status of that section. A green tick indicates all information has been filled in and verified, a yellow warning triangle indicates the current settings are valid but you should check the warning message on the tab, and a red cross indicates missing or invalid settings.
Installation
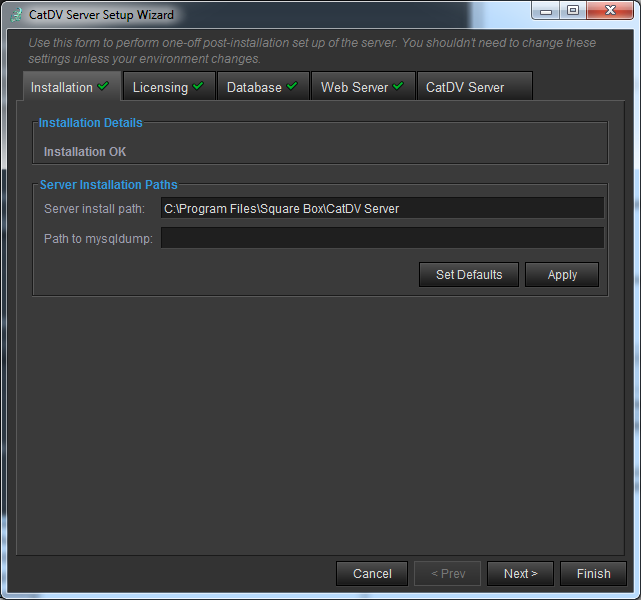
In normal use the wizard will skip this step as it should never need changing.
It allows you to manually specify the install location of the server and the MySQL Dump application.
Licensing
In normal use the wizard will display the Licensing step first, which allows you to enter you license details.
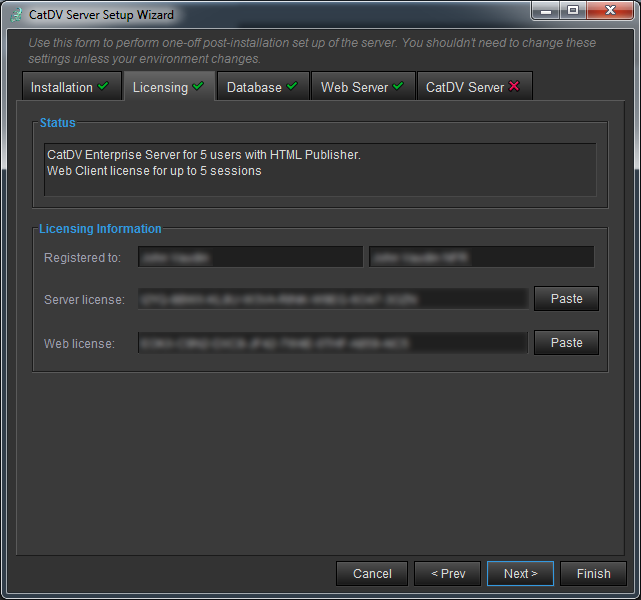
The operation of the server, including how many client connections are permitted, is controlled by a license key or registration code. You will have been sent an email that will contain some lines of text such as the following example.
reg.user = Trial
reg.code = OGOP-JZXL-G1TD-65SI-7F7B-YZ3X-GVJD-6YQQ
(Please contact sales@squarebox.co.uk if you do not have your registration code.)
To enter you license code into the control panel you can copy the whole text of the email and then click the Paste buttons next to the Server and Web license fields. The control panel will automatically scan the email text and extract the relavant fields for you. You can also, of course, enter the values manually. You may have two separate license codes, one for the CatDV Server and one for the Web Client.
Once you entered the license details the red cross at the top of the page should change to a green tick. You can now click Next >.
Database
The next screen lets you configure CatDV Server’s database connection. It is assumed that, if you wish to use an external database server, such as MySQL, Microsoft SQL Server or Oracle, that the database server itself is already installed and configured as described previously
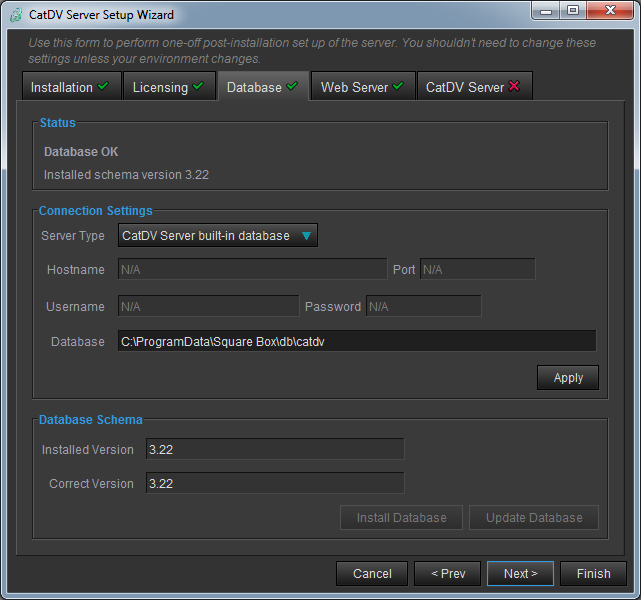
You should first select the database Server Type. This can be:
- CatDV Server built-in database – starting with version 6.8 CatDV Server has a database built into it, so it is no longer necessary to use an external database server. This is the default selection and it is ideal for smaller installations.
- MySQL, Oracle or Microsoft SQL Server – are popular third party database servers. If you select one of these you will need to purchase and install it separately and set it up as described previously. These database servers can provide enhanced performance and robustness for larger installations.
Once you have selected the type of database you will be using, the wizard will fill in default values for the other fields (Port, Username/Password and Database). In most cases, if you have selected the recommended settings during set up, then these will be the correct values, but for Oracle and Microsoft SQL Server you will commonly need to change the username and password.
You can at this point click the Next > button, which will attempt to set up the database using the supplied information. You may be asked for permission to install the CatDV Server schema – you need to accept this to continue. Alternatively you can click the Apply button to manually verify the credentials and other settings you have entered. This will connect to the database and query it for any pre-existing schema and then display the results in the Installed Schema field. You can then choose to manually Install Database or Update Database as appropriate.
Web Server
Starting with version 6.8, CatDV Server provides a built-in web server (based on embedded Tomcat) that can be used as an alternative to installing a separate copy of Tomcat. For new installations it is recommended that this new built-in web server is used, but for existing installations that already use Tomcat you may choose to continue to use Tomcat.
The updated Web Server tab of the Control Panel provides a choice of three options for the web server you want to use:
- Built-in – the new built-in web server recommended for new installations
- Tomcat – for existing installation that do not wish to migrate to the built-in server at this point
- None – for installations that aren’t using the web interface or where Tomcat is to be manually installed on a separate server.
Built-in Web Server Configuration
If you select the built-in web server the following configuration options will be available:

This step has the following fields:
- Port – the TCP Port that the embedded we server should listen on. Also the port that the control uses to monitor the status of the web server.
- Document Root – Location of the root directory (or Java war file) containing the web files that will be published by the embedded web server. Initially this is set to the location of the sample web applications included with the installation. If you wish to create your own customised web interface based on one of these samples you should copy them to another location and then update this field to point to that, otherwise the site will be overwritten next time you update the CatDV Server software.
Note: the CatDV Web Client application itself is not served from this location – it is built-in to the server and is configured to appear at /catdv2. So – if your server is called my_server and the port is set to the default of 8080 then http://my_server:8080 will display the web site stored at document root and http://my_server:8080/catdv2 will display the CatDV Web Client. - Working Directory – a directory where the embedded web server will store it’s working files, such as caches. This probably won’t need to be changed.
Migrating from Tomcat to the Built-in Web Server
If you are currently using Tomcat to host the CatDV Web Client, but you wish to switch over to using the built-in web server, you must uninstall Tomcat (or at least shut down and disable it). Failure to do this will prevent the built-in web server from starting. In the CatDV Server Control Panel Set up Wizard you may see an error message: “Port 8080 in use”. This is symptomatic of Tomcat still running on you machine.
Tomcat Configuration
If you select Tomcat the following configuration options will be available:
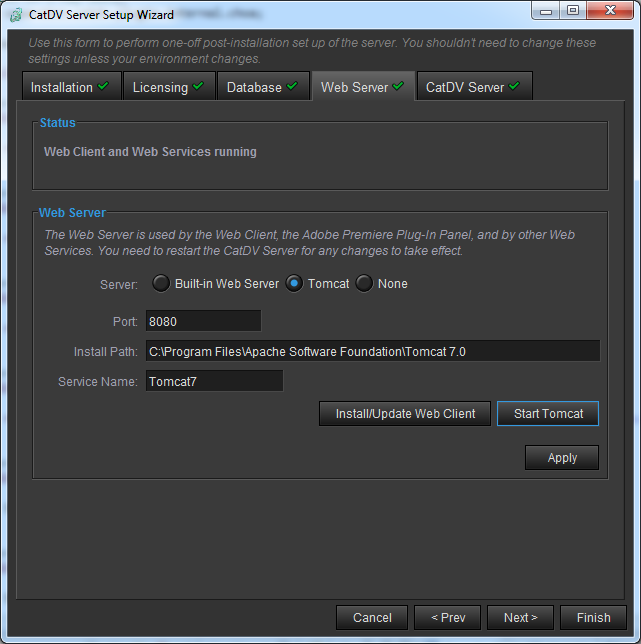
This step has the following fields:
- Port – the TCP Port that Tomcat is configured to use. This is the port that the control uses to monitor the status of the web server.
- Install Path – Location of the the Tomcat installation directory. This is normally filled in automatically and should not need to be changed.
- Service Name (Windows Only) – the name of the Windows Service that Tomcat runs as. Used to stop and start Tomcat. Usually filled in automatically.
Installation of the Web Client under Tomcat requires that the a file – “catdv2.war” – is copied into the Tomcat webapps folder. The Install/Update Web Client button performs this action. The wizard will also do this automatically when you click Next if required. You can also Start/Restart Tomcat from here if required.
Click Apply to verify the settings, or Next > to move to the next step.
CatDV Server
The final step lets you configure CatDV Server’s network settings.
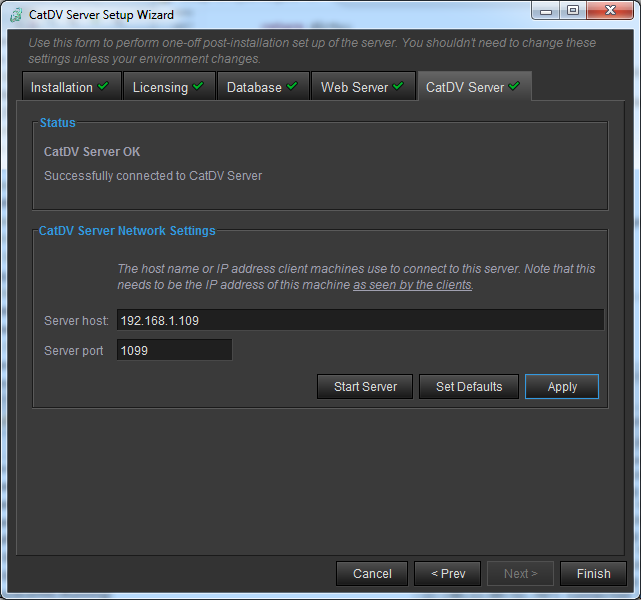
This step has the following fields:
- Server host – the publicly visible hostname or IP address of this server – that is the hostname or IP address that CatDV desktop clients will use to connect to the server. You may need to consult your network administrator for the correct value.
- Server port – the TCP Port number that the server should listen to to server Java RMI requests from the desktop clients. This should not normally need to be changed.
On first run the control panel will attempt to fill in default values to the local address and the ports.
Click Apply to verify these settings, then press Finish. You will be prompted to start the CatDV Server if it is not already running, or to restart it if you made any changes.